Showing posts with label technology. Show all posts

Our Favorite Educational YouTube Channels

We use YouTube a good bit in school. Not only for diving deeper into lessons and for Classical Conversations, but I have a new rule for the kids. If they want to watch their favorite YouTube channels (usually gaming stuff), then they have to watch something educational as well. 

So, here are our favorites:


1. Brave Wilderness (Tbomb loves watching Coyote Peterson)

2. Nature At Your Door (Frank Taylor is wonderful)

3. Peekaboo Kids (We love Dr. Binocs for science)

4. PBS Kids (Snapper loves Wild Kratts)

5. Crash Course (Great for history)


Paperless Planning: Part 5- Google Docs

Google Docs is not a must-have for digital planning, but it is a wonderful tool. Plus, it is free to use and if you have Gmail, you already have access to it. 

Google Docs gives you access to Sheets (similar to spreadsheets), Docs (word processor), Slides (slideshow), and even PDFs. There are also a ton of add-on resources that you can use for free or with subscriptions. 

I use Google Docs mostly for school planning. However, If I do need a document for a personal reason, I no longer have to keep up with a paper copy. I can scan it and have a digital copy with access anywhere. Again, this is another tool that can be set to be used offline. 

In this post, the only thing I'm going to show is how to add a file and how to set it up for the best view. 

To add a file (tax document, school paperwork, doctor notes, etc.), simply click the +New button on the left side and select File Upload or the type of file you want to create. 


The other thing I want to show today is how to set up the view. (I'll go more in-depth on using Google Docs for school files in another post)

Normally, when you go to Google Docs, the default is to show all the files. However, if you want to see your folders when you go to Google Docs, it is a really simple change. 


Click the gear icon at the top right and click settings. Under "Start Page," switch to "My Drive" and you will have the same view I do. 


I'll revisit Google Docs in a future post. 

What I'm using and how I'm using them. (just click on the link below to see the post)


Paperless Planning: Part 4- Google Keep


Although it isn't a new tool, Google Keep is also a new discovery for me and I use it constantly. I use it for packing lists, school to-do lists, school ideas, blog post planning, family projects, and anything else that I would have written out and stuck in my planner. 


Getting Google Keep set up was a little more involved because I was basically converting both my personal and school planners to digital. Here is what I did: 
  1. Set up categories that you are likely to use. I used family, school, camping, travel, blog, and recipes. 
  2. I started with my personal planner and went through it page by page- adding everything to my Google Keep in the appropriate categories. No more recipes floating around and getting lost. Packing lists all together (more about this later). 
  3. Color coding is easy using the controls at the bottom of each note. Easily add checkboxes by clicking the three dots at the bottom of the not and click add checkboxes. 
  4. Repeat this for all planners and all sections. Before you know it, you will have a digital planner/ notebook. 
You can add photos. I've added the map of our favorite campground with our favorite sites marked so I know which ones to look for when I book our camping. 


I wish you could customize the colors used, but it's a minor sacrifice for the convenience of Google Keep, which you can use on any device. As long as it has been synced with the internet, it is available offline too. When you reach the internet, it will update any changes. 

You can also archive notes to be used again later and there is also an option to uncheck all items. 

I'm a list maker, but you do not have to use a list format. You can actually write paragraphs, add websites with the link preview, and add drawings. 

As Tbomb goes into the 8th grade this year, I've been thinking a lot about high school. I also have a running list of things to utilize once we get to high school. 

Another wonderful thing about Google Keep is that you can easily share notes with others. Add your family group or individuals. I love being able to share a to-do list with my kids, especially when getting ready for travel. 

Of the tools I've learned to use, Google Keep is my favorite. I'm a huge fan of notes and lists and this keeps me on track. 

How do you use Google Keep? 

What I'm using and how I'm using them. (just click on the link below to see the post)


Paperless Planning: Part 3- Google Tasks


Google Tasks is a fairly new tool for me. Like the other tools I have shared and will share, Google Tasks is available through all devices. It syncs seamlessly with Google Calendar. It can also work alongside Google Keep (easily move notes from Keep to Google Tasks). 

I love how my tasks show up beside my calendar. There are also wonderful widgets available for tablets and phones that make it quick to see what you need to do, check off items, and even add items to your task list. 


You can also add categories to your tasks, like I have my personal one, ideas for blog posts, ideas for social media posts, and even a business one, although most of my todos go in my personal tasks just so I can see them at a glance. 

When creating a task, you can easily schedule it for a certain date and time. You can also make recurring tasks. For instance, I have a task set for every Friday evening to look over and gather the materials for the next week's school work. 

I put everything on my task list- even changing the litter box and making the kids' lunches and snacks for the next day. I tend to get sucked into a project and forget to do things. With Google Tasks, I can get reminders to do those things I have to do every day. 

When you check the items off, there is a counter at the bottom that tells you how many tasks you have completed. Makes you feel really good if you are like me and love marking things off of a list. 

Is there something you need to remember to take care of in August, like planning the kids' birthday party? You can set Google Tasks to remind you on August 1st. Then, when August 1st gets here, you can break down the tasks into manageable chunks and schedule things. Is this something you need to do every August? Make it a recurring task. 

Adding subtasks is easy as well, although it isn't something I use. I just like to have them all as a separate task. 

How to switch paper lists to Google Tasks: 

  1. Gather all your paper lists. For me, it was my planner, notebook, and weekly to-do list.
  2. Simply start at the beginning of your lists and add them to Google Tasks. Go through your calendar pages for anything you've written to do on certain months. Make sure to schedule those as well. 
  3. Look through your planner and notebooks. Add any to-dos throughout them to your Google Tasks. 
Now you are all set up. Adding things is simple and you don't have to do those steps again. 

Another cool feature of Google Tasks (that I actually do not use) is that your tasks can be added to your calendar. Just click to view tasks on your calendars (left-hand side of the screen). The only reason I don't do this is because I like the view of my tasks in a list together and I don't like how congested my calendar gets with the tasks added in. But everyone has different preferences. 


Now that you have your Google Calendar and Google Tasks set up, you can add tasks from your calendar. Have a meeting next week? Add to prepare notes on your list. 

What I'm using and how I'm using them. (just click on the link below to see the post)


Paperless Planning: Part 2- Google Calendar


Are you ready to get this ball rolling? I do suggest you make these changes during a slow time because getting the system in place will take time, but it will definitely save time in the future. I started this at the end of our school year, but if I had waited until school was done, it probably would have been a quicker start.

I'm okay with that though, I'm so glad to have made this change in my life. It is so freeing to have less. 


I literally have access to everything at my fingertips. (To see the whole series, read about why I went to digital planning)

Google Calendar is the first thing you are going to want to get set up. You probably already use it in some capacity. I did, I just am using it more now. Yet, still not to its full potential. All you have to do is sign in to your Google account and you are ready to dive in. 


First, you are going to want to create your calendars within your account. You can see mine on the left column. They are color-coded. You can share these calendars with others- teammates, family members, committee members, etc. I share the family calendar and Owl Creek Academy (our homeschool) with my kids. They are new to this, but I'm getting them started. You can share family calendars with grandparents and other close family members as well. 

Next, you are going to want to put all your dates from your planner in here. While doing this, go ahead and put in the recurring dates (birthdays, anniversaries, etc). You can invite people to these "events" as well. Make sure you assign them to the correct calendar so they are automatically shared and/or color-coded. You can set up alerts as well. (I only do this for project due dates). 

I love that you can choose the view for your Google Calendar- day, week, month, year, 7 days, and even a view of events in order (schedule). You can choose for your week to start and end on any day you choose as well. 


Hint: If you want all events/ appointments to appear in a box at the top of the week view and In a colored box in the month view, I have figured out how to do this and still use the time. If you'll notice in the picture above, I had to scroll down to see that my son had a class on coding and that I had a meeting. 

In the below image, you can see that if you format the time differently, it will show up as an all day event so it is easily spotted. 


This may not work for people who use the time layout to schedule things. However, we need to keep a more relaxed schedule because things come up. I need to see at a glance if there is an appointed time for something that day, without needing to scroll. 

If you have a more strict schedule, you could even block off time for school, sports, work, etc. No matter your way of life, you can make it work for you. 

I have even created one calendar to track my steps because I like the visual of it- I was writing it on my monthly paper planner, so now I just record it in my Google Calendar. 

Another thing of note. You do not have to have access to the internet to use Google Calendar, only to sync it between devices and online. For instance, if you are in a remote area, you can still add things to your calendar on your phone and it will automatically update it to the cloud when you are in range again. 

There are also fun premade Google Calendars that you can subscribe to. I use the US Holidays & Observances calendar by Google, but copy them to my family calendar so my kids can see them and we don't celebrate every "holiday." I also have a bible reading plan calendar that is added in. 

I know this seems like a lot, but it will be much better and easier once the setup is complete. 

Go ahead and get your calendar out. Copy those dates from paper to digital, making sure to select a calendar and record recurring events. 

Next up, I'll show you hot to track chores and to do lists. It is so easy and right there on your calendar!
What I'm using and how I'm using them. (just click on the link below to see the post)


Paperless Planning: Part 1


A few weeks ago, I shared a Reel on Instagram of my planning process. After I posted it, I realized that I completely left one planner out. I didn't include my school planner and how I use it with my other planners. Then, I realized that I was making it much more difficult than necessary. I knew there had to be a way to make planning simpler. It used to be something I enjoyed, but it became a chore. 

Here's that reel. 

Here is the stack of things I had to have to accomplish anything. Ri-dic-u-lous, I know (does yours look similar?)


Now, I have found a simpler, more productive system. The setup takes time, but it does save time in the long run- and yes, you can still check of completed items. There is something so satisfying about that. Now, all I need is my phone in a pinch. My entire system consists of my laptop, Kindle Fire (just as a larger screen if I don't have my laptop), phone, and a notebook and pen. I do still need a notebook because I do still have to do a physical brainstorming session occasionally and I like to take notes on paper if doing research. However, you could even get rid of the notebook.


With this stack (plus my phone), I can accomplish anything. I can work, plan, school, and accomplish family tasks. I can even share anything with anyone. 

You might be wondering what wonderful program I used to do this with and how much it costs a month. Well, I used free Google tools. The only thing I pay for is $1.99 a month for extra storage since I store work documents and school documents in the cloud. However, I was paying that anyway. 

I'm actually saving more. I don't have to buy an expensive school planner each year, a lot of money on a personal planner that actually works. I also no longer have to buy extra paper, fancy pens (yes, that is a need with a planner), and other planner supplies. I also no longer have to stress trying to figure out which system will work. I can make my Google tools do what I want them to. 

I am going to walk you through how I did this. However, to make it easier to process, because the setup does take time, I will break it into a few shorter posts. They will all be published at the same time so you can read them at once if you want. 

Here are some other benefits to going with a digital planning system. 
  1. Once the setup is complete, most things can be made automatic (no more copying recurring tasks)
  2. Google products are available everywhere and on any device
  3. If you have a Gmail account, you already have the tools available to you- no account set up
  4. It is easy to edit digital items without having to start fresh or scratch through when something is written on the wrong day (I had all my birthdays a month ahead this year in my paper planner and it was a mess!)
  5. It is easy to share with family and co-workers. 
  6. Scheduling is easier because you can easily see availability. 
  7. No more paper clutter and trash from planning
Some people have suggested one change at a time, but that doesn't work for me. I have to jump in with both feet first, and it is working. 

Since getting this system in place, I have less stress trying to figure out what I have to do and keep up with everything. I am also much more productive. I'm getting my work done with plenty of time before deadlines and I even have finished planning the school year for 2024-2025. 

I'm rocking it! 

What I'm using and how I'm using them. (just click on the link below to see the post)
Whether you jump right in or take it slow, I do hope you give my ideas a try. The best part if you can make it work for you. 


5 Reasons Our Kids Don't Watch TV

The Mr and I have gone through a journey with our kids and figuring out what works as far as what we allow in our home to influence our children. We are not screen free by any means, which will be another post in itself. We do have televisions, but we have very strict rules about what the kids watch. 

We homeschool our kids because we want our influence to be what they have in their younger years, instead of someone we do not even know having our kids for 8+ hours a day. 

We really thought about that in the form of television as well. We want to know what is influencing our kids. They do watch movies and because they both have a hard time falling asleep, we do turn a movie on at bedtime, but they are asleep before it is finished. 


First, let me say, I am in no way saying this is what you should do. It is just what is best for our family. Every family is different. 

1. Commercials. The kids still watch TV and their great-grandmother's house. She is a very wonderful Church of God Lady that will switch the channel in a heartbeat if something is not good. She watches with them, so she knows what they are seeing. The problem with this is that when they come home, for 2 days, I hear about the toys they want that they saw on a commercial. My kids are not "I want I want" kids, but after seeing commercials, they sure are. 

2. Episodes. It is near impossible to watch every single episode of a TV series and know that it is okay for them to watch. Some shows seem fine, then there is that one episode that is just way off the mark. 

3. Bad programming. We are just not fans of the agendas being pushed in schools, television, and with the government. We do not yet want our kids exposed when they are still so impressionable. It is allover television. I know this is controversial, but an 8 year old should not even be thinking about sexual orientation. 

4. Lack of educational shows. When the kids were little, they did watch PBS Kids and Sprout, with a little Disney Jr mixed in. I loved the educational shows and the shows helping kids learn to solve problems. Now that they are 8 and 11, there aren't many educational shows available for them. I'd much rather them watch an educational youtube video (that I've already selected), play a game, or even better- read a book or go outside and play. 

5. We aren't big TV watchers. We watch 1 episode of the old Survivor season a night after the kids go to bed and that's it. So, if it is something we aren't really into, why are we going to create that habit in our kids. 

Like I said, we are far from screen free in our house. The kids have tablets, old smart phones (with no service) and other electronics. They also have a TV/ DVD player in their room, but actual television is a big no in our house. We even turned our sattelite off and switched to streaming services. 

What are your thoughts on kids watching television? 

Tips for Balancing Remote Work and Parenting Full Time

 Thanks Bunny Studio for these tips!


1. Keep things flexible
If you have the ability, consider getting creative with your work schedule to base your hours around your kids’ schedules. Giving yourself the flexibility to work differently during this time is crucial to maintaining work-life balance. 

2. Establish a kid-free zone
There will be times when you need to hunker down and complete work items free from distractions, which is why it is important to establish an area of the house where you can separate yourself from your family. 

3. Clearly communicate with your family
If you have a partner who is also working from home and sharing kid duties with you, it is crucial to communicate the times you can and cannot help out during the day. Setting these expectations will allow for a much smoother daily routine.

It is also important to communicate with your children if they are old enough. Set expectations for when there will be breaks in your day that you can check-in, whether it be a quick snack break, lunch, or even hourly check-ins. 

4. Don’t overwork
During this time, it can be easy to feel like we need to push ourselves to work extra hours, but the reality is that taking the time to unplug and reset each day is critical to success as a parent and an employee. 

Organize Backpacks for Travel

It is no secret that I am kind of obessed with my kids' backpacks. A couple years back, I invested in a Pottery Barn Kids backpack for each kid. I had fallen in love with the doll carrier one for Koda and then found the Spider-Man one for Tbomb (it even glows in the dark). The doll carrier one is no longer available, but the MacKenzie backpack will carry a doll as well!


While I spent a little more than I had on their backpacks in the past, I have not regretted this decision. You get what you pay for and there is no wear on these backpacks. They will be using them for years because they are such good quality. Also, because I bought more "classic" designs, they will grow with them. About 6 months after, I upgraded their water bottles to the MacKenzie bottle and could not be happier. I love the entire Mackenzie line! Mackenzie toiletry bags, allergy tags, and hooded ponchos are next on my list for the kids.

One of the things I love so much about the backpacks from Pottery Barn Kids (note: this is not a sponsored post. I bought them and love them. We've used them a while and I wanted to share) is the organizing possibilities and that because of the way they are set up, the kids can keep them maintained themselves. I only redo them and resupply every few months.

Seriously, I love these bags and they have been worth the investment, as have the water bottles- the kids use them every single day to make sure they get enough water.

Now, enough fan-girling. On to the organizing!

Start with cleaning the bags out, washing them, and hanging them in the sun for a day. (This post)

1. Divide items into pouches. This might not work for all kids, but mine have to have "containers." The pouch the coloring items are in was from a Hatchimals Easter gift and it works perfectly.

The tablet cases are from the Innotab days and still work for the Kindle Fires, even with the updated standing cases. The little pockets are perfect for cables and other accessories as well. Their battery packs even fit in the bottom. I like that they have a little more protection inside the backpacks as well.


2. If your child has medical needs, take care of those. Koda has to have pull-ups, wipes, and a change of clothes, so I have those in a clear bag. The clear bag makes sure that grandparents or whoever she is with can find them. I would much rather just use a pretty wet/ dry bag, but that is what I'm using now.

She also has an inhaler. For now, it stays in my purse, but eventually, it will go into her backpack and have to have a case of its own with the mask. Make sure the pocket things like this are in have a label letting people know where it is.

Tbomb has to have a medical card, which I put in the bag label pocket on the inside. Also, both kids have masks to prevent illness, (even before COVID-19) so those are handy for them.


3. If the bag is for adventures, be sure that there is a toy and an activity book. If it is for school, be sure those items are removed.

4. That is basically it. Make sure to designate a place for snacks and drinks, so the kids can always find them. Pretty simple!!!


CarSeat Cinema Review and 10 Places You Can Use It + Door Ding Danger Decal

Disclaimer: I received products in exchange for this post. All opinions are my own. 

As I've mentioned before, technology is huge in our house. We use technology for business, entertainment, school, organizing, and more. We don't shun technology, we embrace it! Even the kids have tablets, plus a couple of our old phones. The problem comes in organizing them and putting them in different places. Thanks to CarSeat Cinema, that problem is solved!

A photo posted by cari (@cari_on) on

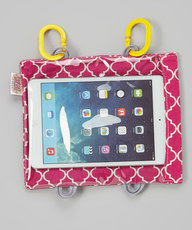
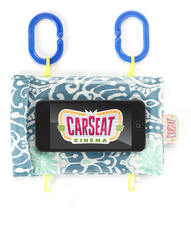
Carseat cinema has answered many of my problems with using electronics with kids. It has a back (and flap) made from a padded fabric in a choice of many gorgeous patterns. The front is made of a thick clear plastic to protect your screen, while still allowing the touch screen to be usable. There are 4 elastic loops on the phone case and 8 thicker alastic ones on the tablet cases. These links can then be used to hang it. We were sent a mini tablet one in Fuschia Lantern and phone ones in light blue bollywood. You can also get them large enough for a standard tablet.

Carseat Cinema allows the tablet or phone to be used while keeping them protected from scratches, dings and even grimy fingers. The coushion fabric allows for some protection against drops.

Want to let your little one watch a cartoon, but not touch the device itself? Carseat Cinema can be attached to just about anything so you can accomplish that as well. This will also allow you to let them play games without the fear of them dropping it.

You can wash it- hand wash it to clean the fabric and let it hang dry. If the vinyl gets dirty, just wipe it with a wet cloth or wet wipe and you are good to go.

10 Places To Use The CarSeat Cinema

The majority of these are appropriate for tablets and phones.

1. Naturally in the car- even hang it from the backseat for rear-facing babies, or on the canopy of a carseat or stroller.

2. Shopping- attach the links to the handle of the buggy or, to the stroller so your little one is entertained and you can shop to your heart's content.

3. Kitchen- hang it from your cabinet knobs to see your favorite recipe or watch a video. Use it to let little one be entertained while you cook.

4. Kid's room- Let them watch a cartoon on the tablet or phone during nap/ quiet time. Hang it from their bed for easy viewing.

5. On your bicycle handles or steering wheel for using GPS.

6. During Craft time- Want to Facebook while you glue sequins to that lampshade? No problem, just put your phone in CarSeat Cinema and you are good to go.

7. In A Restaraunt- Attach it to the highchair and let them play to their heart's content. you can use it there too without worry of something getting spilled on your device.

8. In the Garage- Working on the car? Watch videos and do research without fear of getting grease on your tablet.

9. At the Doctor's- Want to keep your kids entertained and in contact with as few germs as possible (I don't let my kids play with the toys or read the books)? Put the device in the CarSeat cinema, then spray with lysol when you leave.

10. Anywhere. Letting your kid play with your phone or tablet? attach more links to the ones on the Carseat Cinema and then link them on someting so that it does not fall tto the floor- perfect for cartrips- no more reaching to the floor to find the tablet.

CarSeat cinema can be used with other devices as well, like the LeapPad and Innotab. Use your imagineation and use it to your heart's desire.

Fuchsia Lantern Medium Size Tablet Case Light Blue Bollywood Smartphone Case

 Door Ding Danger Decal

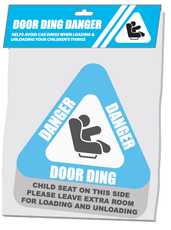
Blue Magnet Decal 1 packCarSeat cinema's sister compan, Door Ding Danger Decal, is a lifesaver to grocery shopping mommas everywhere. Just place this magnet on the doors with carseats and it will let those neighboring cars know to leave a little extra sp(yes, I'm talking parking at the bottom otf the lot). ace. We all know what it is like to be trying to put a baby carrier, toddler, or preschooler in the car, but there is very little space for the door to open. I know I'm always terrified that I'm going to endup banging the other car with the door. I've even gone to extreme precautions to keep this from happening. 

You can get one of these handy magnets for just $8.99 or a two pack for $13.99

Be sure to order your CarSeat Cinemas and Door Ding Danger Dcals today! 

The 5 Best Apps For Travel: Kids Edition

Whenever we are about to head out for a long day trip, going on vacation, or the kids have a doctor appointment, there is one thing I do the night before to make life a little bit easier. I download a new app to Tbomb's tablet. Today I'm going to share the 5 best apps for being away from home for your little ones. These are a combination of fun, educational, and reminiscent of the games we played growing up.

Note: While there may be apple versions of these apps, we use Amazon App Store and Google Play.

1. Kids Academy Apps- This is a whole line of apps that I am particulary impressed with. Designed with preschoolers in mind, these games teach a variety of preschool games while having your kiddo collect firelies in a jar.


2. Big City Animals- Teaching new skills with each location travelled too, Big City Animals has a catchy song that you will be singing along with as well. My little guy just loves the characters, especially Boston Bernie. 

Boston Bernie Spans the City - app

3. Bible For Kids- This is one of Tbomb's favorites. It reads the bible story and has adorable animations to go along. They are adding new stories all the time, so be sure to download the stories once your app is installed. 

Bible for Kids - screenshot

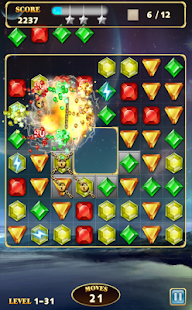
4. Jewel Star 3- This game really does keep him and the whole family entertained. We all have it on our devices. 

Jewels Star 3 - screenshot thumbnail

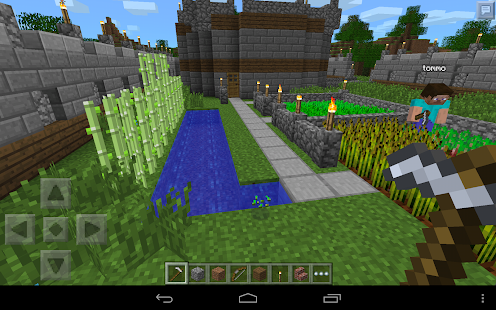
5. MineCraft Pocket Edition- Normally I do not buy apps for Tbomb. I usually download free ones. I paid $6.99 for this app and it was worth every penny. It keeps him entertained and honestly it helps his creativity and problem solving skills. 

Minecraft: Pocket Edition - screenshot thumbnail


Play Your Way Through Parenthood With This App #BabyBootCamp

Parenting can be stressful. Parenting can be messy, overwhelming, unpredictable, and even very exciting. Few companies know all the ups and downs of parenthood like The First Years. To help you find humor in the every day, destress after a long day, and pass the time, they have developed a great game to help along the way - Baby Boot Camp Game.

This free game takes you through feeding, soothing, bathing, and potty training- all while having fun. You get to make baby happy by playing through the 4 games. These games include "Hungry Baby," "Catch This," "Sweet Silence," and "Potty Drop." You can even share your score on Facebook and challenge other parents!

Baby Boot Camp is available for free on the Google Play Store and the Apple App Store. After you download, be sure to come back here and let me know how you did!


Tech Tools: Square Jellyfish

Disclaimer: I received samples to review. All opinions are my own. 

I have been drooling over so many of the products at Square Jellyfish for so long now that I was over the moon when I got the chance to try a couple out. Seriously, if you have not seen their amazing products, you definitely should head over to Square Jellyfish. They sent me two of their iconic products to try out and I'm in love! In addition to the Jelly Remote and the Car Vent Mount, they offer tablet and phone adapters, tripods, ball heads, and even a cool earphone case that is also a stand. These products are perfect for travel and having on hand in your tech pack!


Car Vent Mount

We use our smart phones for so many things now, that we almost always have them on hand. We use them for phone calls, texting, taking photos, and even GPS. Because of this, we need them with us in the car, but do not need them sliding around and do not need them in our hands. We need them viewable for GPS and hands free talking. With the Car vent Mount ($16.95 here) we can have this with a sturdy holder that is easily adjustable and within viewing distance. It will hold most phones, even most larger models (like the iPhone 6 and LG L0 like I have). As an added bonus, it even works as a stand or your phone away from the car! 

Jelly Remote

I was sent the 4 button remote by Square Jellyfish, but they also make a flashlight remote (light up your subject and snap a photo). 

I just love this remote. It and the Car Vent Mount are ALWAYS with me. I love that it is bluetooth enabled (with a dongle, I use it with the tablet in the car for the kids). I can control the volume, track, play/pause (music, video, and movies), and take photos. It really doesn't get any better than this. Except for when you add in the bluetooth capabilities. It reaches the standard 33 feet as well- really handy for turning down the volume for the kids. 

Have a bluetooth speaker? use this remote to control the volume with it as well. It works with android and apple devices. ($35.44 here)

Use the remote and the car vent mount together to get photos of your family! All without lugging everything with you! 


10 Tips For Shooting POV

Shooting POV (point of view) videos is something kind of new to me. I have used them before, but basically just clipped them on. Since receiving my MeCam, I have been paying more attention to what I am doing so that I get a better shot. While I do have a GoPro, it is mostly for evidence collection and it is aimed a certain direction. My MeCam is geared towards documenting my investigations and getting some behind the scenes videos. Today, I'm going to share with you some tips I have found for getting the most out of using your POV camera.


1. Get To Know Your Camera

Different cameras have different strengths and weaknesses, they also have different settings. Getting the most out of your POV shooting experience depends a lot on getting to know your camera. 

2. If Needed, Have The Appropriate Mounts

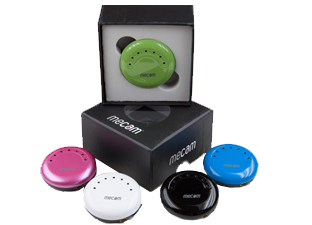
One thing I love about the MeCam is that it pins on (like a lapel pin) and can also be worn on a lanyard. That makes mounting simple. However, many other POV cameras require mounts. I have several for my GoPro, and use them for different reasons. If there is going to be a certain thing you mount your camera to a lot, make sure to invest in a good mount for that. For instance, my backpack mount is my favorite. I can clip it to my backpack strap or my hat. 

3. Keep It Short

No one wants to watch 30 minutes of you skiing down a mountain or walking through an abandoned house. I mean, I don't even want to watch myself doing that. Keep your video to just a few minutes of footage- keep the good stuff, of course!

4. Do Something Exciting

Walking around your house is generally not youtube worthy (although there are exceptions). Make sure you catch the excitement in your life. 

5. Try Different Mounts

Although I have my preference, I have tried out many different mounts. One that you didn't think would work may shock you- the head mount shocked me! 

6. Try Different Angles

The angle can make all the difference in your video. I have tried walks through the woods with mine pointing up and even behind me. The views are breathtaking- we usually don't look at things this way. The same goes for other activities as well. 

7. Narrate

Tell your audience what is going on- pretty simple. 

8. Use A Pole

Can't get the right angle? Enlist the help of a pole attached to your mount, or even a selfie stick and you can control what shot you get. 

9. Check Your Shot

Make sure your angle is right- it would be horrible to get that perfect experience only to find that your camera didn't catch it. Also, try your camera out before you are depending on it. 

10. Have Fun

Your audience knows if you aren't having fun- show them some fun! 

10 Ways To Use A Digital Voice Recorder

I know I've been talking a lot lately about Uqique and their digital voice recorders. I'm sure you also may think that either you don't need one or that one is plenty, well you may be wrong. There are so many uses for these handy little devices that you may need more than one. Even better- with Uqique's prices, you can afford it too!


1. Record Thoughts or Notes

Sometimes we think better doing our normal daily activities, not while sitting in front of our computers or notepads. Keep a digital voice recorder with you and when a thought or idea comes to mind, record it!

2. Record Lectures

Oh how I wish I'd had a digital voice recorder in college. Those lectures wouldn't have lost to the dark recesses of my mind after I got back to my dorm room. I can't count how many times I looked over my notes and wondered what something was about. 

3. Record Interviews

Whether you are recording for a show, a client for an investigation or a client for a job- having a voice recorder could make things so much simpler. You can go back and listen many times and make sure the client will be happy and your research correct. 

4. Have An Audio Sequence of Events

Using a digital voice recorder during set up could be amazing. You can record all of your initial readings, where and why your equipment is in certain places, and even not special things about the location. You wouldn't have to worry about remembering to write it all down. 

5. Stick With A Camera

We all know that the audio on cameras isn't all that great. If you have a hot spot of activity and want to make sure you catch everything, stick a digital voice recorder next to the camera so you are sure to capture great audio and video. 

6. Leave With A Trigger Object

Is there an area where you are investigating that has evidence of a child spirit? Use toys as a trigger object and place a digital voice recorder nearby- don't forget an emf detector. You never know what you might catch. 

7. Have It Always Running

Keep a digital voice recorder with you during an investigation. Keep it running the whole time- in addition to the one you use for EVP sessions. Sometimes EVPs can be caught by one recorder, but not another. In addition to that, if something happens, you can just voice it and have a record of the night. 

8. Keep It At Command Central

Keep a voice recorder by command central and use it for those monitoring the cameras. Also, it will catch when the team discusses events of the night. Also, use this for team members to document any experiences they have right away.

9. Record Night Time Forest Activity

We hang voice recorders in our research over night when there has been a lot of activity. You would be surprised at what you'll catch when no one is around. Just be sure to protect them from the weather. 

10. Record Moments To Remember

Whether you are recording first words, school moments, weddings, or any other milestone of life, having an audio account of that moment can be amazing. You can also record elderly members of the family so your children can always hear their voices. 

If you are looking for a new digital voice recorder, check out Uqique. Their prices and quality will amaze you. 

Take Amazing Selfies with #SelfieMaster

Disclaimer: I received a product to review all opinions are my own.

I have mentioned many times using my monopod. It is great for holding my camera steady while filming and walking. It doesn't solve another problem I have. I sometimes need to film myself in front of something. That can be in front of a historical location, a tree structure, or even in front of some of the team members.

When I'm filming, sometimes it is for a podcast, and other times it is for evidence. During these times, I need a good shot of me and what I'm standing in front of. I also love taking group photos, but we want the whole team in there, not the photographer left out. That's where the SelfieMaster comes in.

It extends up to 1005mm. It has anti-rotation on the rod itself so that the weight of the phone (or camera) will not let it slip while filming. Yes, the phone adapter screws onto a tripod end, so you can use a camera with it as well. I think one of the coolest things about the SelfieMaster is that it is Bluetooth enabled. Just pair it with your device after charging and you are good to go. Just press the shutter button on hte handle to take your photo.

Another benefit to the #selfiemaster is the phone holder itself. It holds larger phones (even my LG L90 and the new iPhones.). There is a rubber grip that keeps it in place without scratching your phone. Another thing I really like about it is that it holds the phone much more securely than other phone adapters for tripods and monopods.

I think I will actually start doing video diaries with investigations and expeditions, now that I have this awesome gadget.

5 Uses For A POV Camera That You've Never Considered

This is part of a content series for MeCam. All opinions are my own.

I'm sure you've guessed that one of my favorite gadgets is a POV camera, more specifically, my MeCam. I'm sure that you've also wondered how you would use a POV camera.


1. Paranormal Investigations

As you've guessed, we use POV cameras on our paranormal and cryptid investigations. The uses inside these circumstances vary. We can use them during setup to take initial readings with equipment. We can use them during an EVP session in case there is something odd going on visually. We can also use them on ourselves to catch a different angle. For instance, if something keeps happening just out of our peripheral vision, we can situate a POV camera to point that direction and hopefully catch it. We actually are always coming up with different uses. 

2. Mom/ Dad Shots

Are you dying to get that perfect shot of your little one walking or crawling? Just pin a MeCam on your shot and get your little one to come to you. You'll get that perfect eye level shot. Do your kids say adorable things but never when a camera is pointed their direction? Well, this should solve that problem. Want to get a shot from your kids' angles? Just pin a MeCam to their shirts and then watch the world from their view. 

3. Track Your Dog's Behavior

Wondering how your dog keeps getting muddy or stinky? Well, MeCam can solve that mystery. Pin it to their collar and watch the mystery unfold. It would also be cool to get shots from their angles and post to social media. Most people are intrigued by how the animals see the world. 

4. Legal Reasons

Holding a sensitive interview? Got stopped by the police? Participating in a protest? Serving papers? MeCam can come in handy with so many different legal issues. Cover yourself and get video of the situation. Just make sure that you live in a state that is single party consent for recording. South Carolina is, in case you are wondering. 

5. Nanny Cam

Do you have a new babysitter or Nanny? Do you wonder if everything is going smoothly? Do you have a feeling that something is just not right? Well, pin a MeCam somewhere and then see for yourself. You can do the same thing at your child's daycare or school. 

There are so many different uses for a POV camera that it's one of those things everyone could use in their arsenal. My favorite is MeCam- Quality, Cost Effective, and Cute!

Travel Solution: Entertainmount #SummerPrep2015

Disclaimer: I received a product to review. All opinions are my own. 

I am always looking for ways of attaching my phone and tablet and phone to things. I use them so much that having a variety of ways to mount them and hold them is a necessity. I use them at home, for working, with the kids, homeschooling, at events, at meetings, and during investigations. I'm sure you get the point. I'm always attached to my gadgets. Entertainmount is my best solution. It is by far the most versatile mounting accessory I have found.

Using the straps that came with it, it can be attached to car seats, cabinet doors, beds, treadmills, bicycles, and so many other things. I can also use it with other accessories I have to make it even more versatile. I can attach it to a music stand, tripod adapters, and so many other things. We have used it with my tablet, my son's tablet, and my phone. It is pretty much with us anywhere because the uses are endless.

One of my favorite features is that the center of the Entertainmount swivels. What does that mean? If you mount it between seats in the car, you can spin the device around and select different movies and shows without contorting your body is strange ways.

The Entertainmount is a must have accessory for any techy family.