I have had these random tins lying around the house. From lunchboxes to tins makeup came in, to game tins that the pieces are missing from. I didn't want to just throw them away because I knew I could find a use for them, I just couldn't come up with one. Finally, while browsing the Oriental Trading site, an idea hit me. Why not make travel activity tins for the kids with them?!
All you need is a random tin you no longer need, Plaid chalkboard paint, dry erase sticker sheets, magnets, and a pouch. Really simple, huh? You can find everything you need at Oriental Trading, I just happened to already have the tin containers.
First- Paint the inside of the lid with Chalkboard paint.
This is easier than I thought it would be- Just be sure to give it two coats. I used a foam brush, but I'm sure you can use any. Let it dry for an hour between each coat and cure overnight. I promise it ends up smoother than this looks.
Apply Dry Erase Sheets To The Outside Of The Lid
Leaving enough to fold over the edges, trace the lid of the tin out on the back side of the dry erase sheet. Stick it down, but be sure to keep it center. Cut the corners at an angle and fold around the edges.
Add Magnet Dots To The Back Of A Pencil Pouch
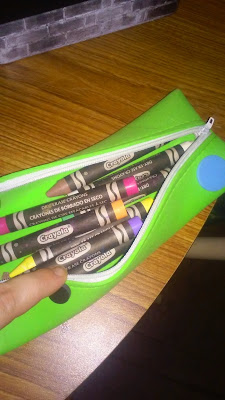
Any pencil pouch that will fit in the tin will do. I think these foam pouches from Oriental Trading are the best because they can be easily decorated and will fit in most tins. In fact, they even come with foam shapes to stick to them. After you stick the self-adhesive magnet dots to the pouch, stick it to the tin. I put Tbomb's dry erase crayons in the pouch, but you can use it for anything.
Fill It With Goodies
I put a magnetic clip inside. I also include zip bags that are the same size as their alphabet activity sheets (half size) so they can reuse those. I can just put the paper in the bag and clip it on and we have reusable activity sheets. I also added magnet dots to the back of a DIY puzzle. You can put whatever your children like to do here. I will be adding some stencils and probably turning some stickers into magnets for "story telling." This is the fun part. Get creative and have fun with your littles.
This is a fun project. If your kids are old enough, you can even get them to help. I can't wait to pull these out on trips. They will be perfect in the car, at someone's house, or even in a hotel room.


No comments :
Post a Comment